


摘要
MogDB提供了gs_install_plugin/gs_install_plugin_local工具用于安裝插件,目前支持安裝的插件包括pg_repack、pg_trgm、dblink、wal2json、orafce、pg_bulkload、pg_prewarm等。gs_install_plugin適用于一主多備部署的MogDB,gs_install_plugin_local適用于單機部署的MogDB。
這兩個工具是python編寫的腳本,直接可以看到源碼實現。本文通過對兩個工具的源碼進行分析,希望從底層了解插件安裝的原理,掌握原理后可以在安裝出現問題或者手動安裝時對整個安裝流程有所幫助。
整體流程
主要流程有如下幾個步驟:
1 解析參數
根據命令行傳入參數進行解析,并設置相關變量,如:要安裝哪些插件、是否強制覆蓋、指定安裝包路徑、是否開啟調試信息等。
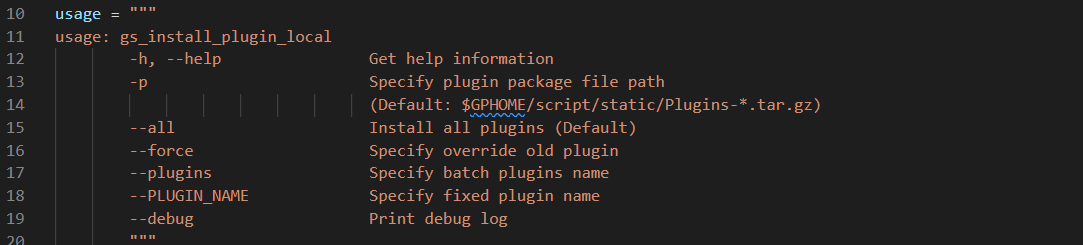
- -h, --help
顯示幫助信息
- -p
指定plugins安裝包位置,默認在$GPHOME/script/static尋找plugins安裝包
- –all
安裝全部插件
- –force
指定覆蓋舊的插件
- –plugins
可安裝多個插件,–plugins后跟插件名
- –PLUGIN_NAME
指定安裝某一個插件,如:–dblink
- –debug
輸出debug信息
詳細請參考“官方文檔”
2 初始化Deploy類
將解析好的參數賦值給Deploy類的成員變量。

幾處關鍵代碼:
- 環境變量和關鍵目錄
GAUSSHOME = os.getenv("GAUSSHOME")
GPHOME = os.getenv('GPHOME')
LIB_POSTGRESQL_DIR = f'{GAUSSHOME}/lib/postgresql'
EXTENSION_DIR = f'{GAUSSHOME}/share/postgresql/extension'
CONTRIB_DIR = f'{GAUSSHOME}/share/postgresql/contrib'
主要是得到下載插件包的目錄和安裝openGauss插件的系統目錄。
- 插件包目錄
如果沒有設置-p選型,則使用默認目錄
self.plugin_pkg = f"{GPHOME}/script/static/Plugins-*.tar.gz"
- 解壓插件包的目錄
self._plugins_temp_dir = f"{GPHOME}/script/static/plugins/"
self.executor(f'mkdir -p {self._plugins_temp_dir}')
logger.debug(f"deconpress plugin package to {self._plugins_temp_dir}")
self.local_execute(f"tar -xf {self.plugin_pkg} -C {self._plugins_temp_dir}")
- 集群相關
-X Specify the XML file path
如果是集群安裝(使用gs_install_plugin工具),需要指定cluster_config.xml的位置,通過下面方法獲得具體node的ip地址并檢查鏈接:
self.nodenames = self.read_cluster_hosts(self.xml)
self.ssh_tool = SshTool(self.nodenames)
- 讀取desc.json文件
解壓MogDB插件包后,文件夾下面有desc.json文件,文件中包含了版本信息,插件名稱和安裝的目標路徑。插件名稱對應同級目錄下插件目錄的名稱,files節點對應了插件目錄中的文件。
{
    "version": "3.0.1",
    "plugins": [
        {
            "name": "pg_trgm",
            "files": {
                "pg_trgm.so": "lib/postgresql",
                "pg_trgm.control": "share/postgresql/extension",
                "pg_trgm--1.0.sql": "share/postgresql/extension",
                "pg_trgm--unpackaged--1.0.sql": "share/postgresql/extension"
            }
        },
        {
            "name": "dblink",
            "files": {
                "dblink.so": "lib/postgresql",
                "dblink.control": "share/postgresql/extension",
                "dblink--1.0.sql": "share/postgresql/extension",
                "dblink--unpackaged--1.0.sql": "share/postgresql/extension"
            }
        },
        {
            "name": "orafce",
            "files": {
                "orafce.so": "lib/postgresql",
                "orafce.control": "share/postgresql/extension",
                "orafce--3.17.sql": "share/postgresql/extension"
            }
        },
        {
            "name": "wal2json",
            "files": {
                "wal2json.so": "lib/postgresql"
            }
        },
        {
            "name": "pg_repack",
            "files": {
                "pg_repack": "bin",
                "pg_repack.so": "lib/postgresql",
                "pg_repack.control": "share/postgresql/extension",
                "pg_repack--1.4.6.sql": "share/postgresql/extension"
            }
        },
        {
            "name": "pg_bulkload",
            "files": {
                "pg_bulkload": "bin",
                "pg_bulkload.so": "lib/postgresql",
                "pg_bulkload.control": "share/postgresql/extension",
                "pg_bulkload--1.0.sql": "share/postgresql/extension",
                "pg_bulkload.sql": "share/postgresql/extension",
                "pg_bulkload--unpackaged--1.0.sql": "share/postgresql/extension",
                "uninstall_pg_bulkload.sql": "share/postgresql/extension",
                "pg_timestamp.so": "lib/postgresql",
                "pg_timestamp.sql": "share/postgresql/contrib",
                "postgresql": "bin",
                "uninstall_pg_timestamp.sql": "share/postgresql/contrib"
            }
        },
        {
            "name": "pg_prewarm",
            "files": {
                "pg_prewarm.so": "lib/postgresql",
                "pg_prewarm.control": "share/postgresql/extension",
                "pg_prewarm--1.1.sql": "share/postgresql/extension"
            }
        },
        {
            "name": "dolphin",
            "files": {
                "dolphin.so": "lib/postgresql",
                "dolphin.control": "share/postgresql/extension",
                "dolphin--1.0.sql": "share/postgresql/extension"
            }
        },
        {
            "name": "whale",
            "files": {
                "whale.so": "lib/postgresql",
                "whale.control": "share/postgresql/extension",
                "whale--1.0.sql": "share/postgresql/extension"
            }
        },
        {
            "name": "postgis",
            "files": {
                "libjson-c.so.2": "lib",
                "libgeos_c.so.1": "lib",
                "libproj.so.9": "lib",
                "libgeos-3.6.2.so": "lib",
                "libgdal.so.1": "lib",
                "liblwgeom-2.4.so.0": "lib",
                "postgis-2.4.so": "lib/postgresql",
                "rtpostgis-2.4.so": "lib/postgresql",
                "postgis_topology-2.4.so": "lib/postgresql",
                "postgis.control": "share/postgresql/extension",
                "postgis--2.4.2.sql": "share/postgresql/extension",
                "postgis_raster--2.4.2.sql": "share/postgresql/extension",
                "postgis_raster.control": "share/postgresql/extension",
                "postgis_topology--2.4.2.sql": "share/postgresql/extension",
                "postgis_topology.control": "share/postgresql/extension"
            }
        }
    ]
}
3 執行部署

- 解析desc.json文件,將解析結果存到datas[]中
        datas = []
        # json file to obtain plugin information, add to datas
        with open(desc_path, 'r', encoding='utf-8') as f:
            result = json.load(f)
        if "all" in para:
            datas = result.get("plugins")
        else:
            for plugin in result.get("plugins", {}):
                if plugin.get("name") in para:
                    datas.append(plugin)
        if not datas:
            raise Exception("Invalid plugins: %s" % para)
- 遍歷datas[]中插件信息,進行文件copy,完成安裝
# plugin file copy
for data in datas:
    name = data.get("name")
    if not name:
        continue
    for file, path in data.get("files").items():
        source_path = '/'.join([self.plugins_dir, name, file])
        target_dir = '/'.join([GAUSSHOME, path])
        self.copy_file(source_path, target_dir)
    print("SUCCESS: %s" % name)
- 文件copy過程
def copy_file(self, source, target_dir):
    file_name = os.path.basename(source)

    if self.local_mode:
        if os.path.exists(f"{target_dir}/{file_name}") and not self.force:
            print("Warning: file %s already exists, skip copy" % (file_name))
            return
        return shutil.copy2(source, target_dir)
    for host in self.nodenames:
        if not self.force:
            _, output = self.ssh_tool.getSshStatusOutput(f"test -f {target_dir}/{file_name} && echo 1 || echo 0", hostList=[host])
            output = output.split(':')[-1]
            if int(output) == 1:
                print("Warning: [%s]: file %s already exists, skip copy" % (host, file_name))
                continue
        self.ssh_tool.scpFiles(source, target_dir, hostList=[host])
如果是本地安裝則直接copy:shutil.copy2(source, target_dir)
如果是集群按照則使用scp進行copy:self.ssh_tool.scpFiles(source, target_dir, hostList=[host])
使用gs_install_plugin_local一直openGauss插件
準備環境
- 下載,安裝插件包
[omm@host-10-208-76-194 script]$ cd /opt/mogdb/tool/script/
[omm@host-10-208-76-194 script]$ mkdir static
[omm@host-10-208-76-194 script]$ cd static
[omm@host-10-208-76-194 static]$ wget https://cdn-mogdb.enmotech.com/mogdb-media/3.0.1/Plugins-3.0.1-openEuler-arm64.tar.gz
[omm@host-10-208-76-194 script]$ ./gs_install_plugin_local
SUCCESS: pg_trgm
SUCCESS: dblink
SUCCESS: orafce
SUCCESS: wal2json
SUCCESS: pg_repack
SUCCESS: pg_bulkload
SUCCESS: pg_prewarm
SUCCESS: dolphin
SUCCESS: whale
SUCCESS: postgis
- 安裝插件(默認全部安裝)
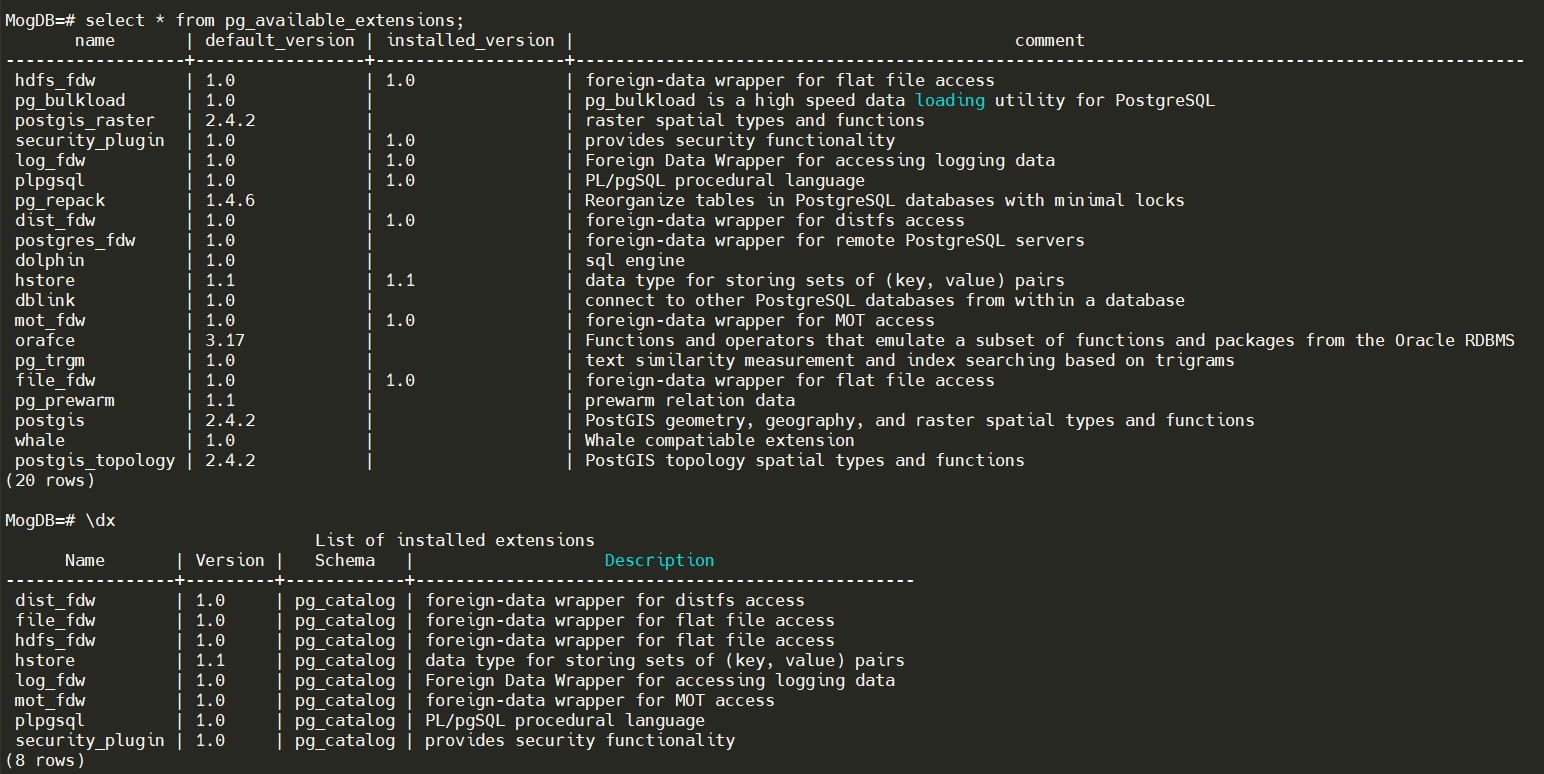
- 創建插件
MogDB=# create extension orafce;
CREATE EXTENSION
MogDB=#
- 下載編譯openGauss插件
參見“MogDB秘籍 之 乾坤大挪移”中的關于編譯安裝openGauss插件章節。
遷移插件
以lo插件為例,進行遷移
- 創建lo目錄
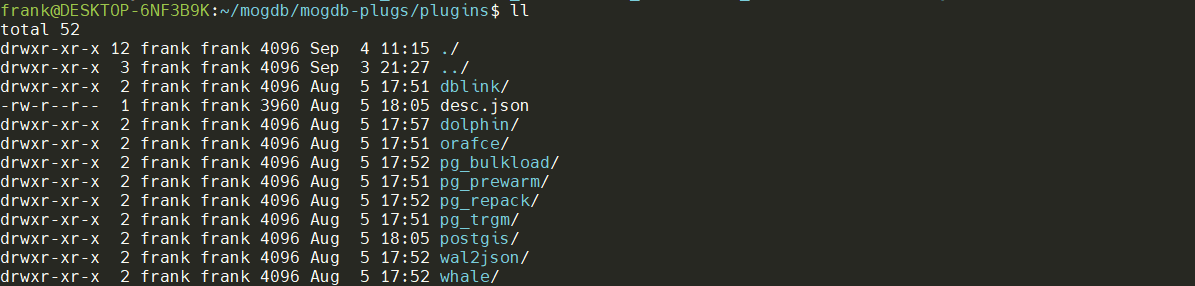
[omm@host-10-208-76-194 plugins]$ cd  /opt/mogdb/tool/script/static/plugins/plugins
[omm@host-10-208-76-194 plugins]$ ls
dblink  desc.json  dolphin  orafce  pg_bulkload  pg_prewarm  pg_repack  pg_trgm  postgis  wal2json  whale
[omm@host-10-208-76-194 plugins]$ mkdir lo
[omm@host-10-208-76-194 plugins]$ ls
dblink  desc.json  dolphin  lo  orafce  pg_bulkload  pg_prewarm  pg_repack  pg_trgm  postgis  wal2json  whale
[omm@host-10-208-76-194 plugins]$
- 將openGauss插件復制到MogDB插件目錄,并修改屬組
[root@host-10-208-76-194 lo]# cp lo.so lo.control lo--1.0.sql /opt/mogdb/tool/script/static/plugins/plugins/lo
[root@host-10-208-76-194 lo]# chown -R omm:omm /opt/mogdb/tool/script/static/plugins/plugins/lo
- 修改desc.json

- 重新打包
tar -zcvf Plugins-3.0.1-openEuler-arm64.tar.gz plugins/
注:這里重新打包有點麻煩,也可以修改代碼,注釋掉解壓的步驟,或者優雅一點,則可以增加參數控制是否重新解壓,如果不重新打包則解壓是desc.json會被覆蓋成老版本的,導致安裝新插件失敗。
總結
總的來說這兩個工具還是比較好用的,代碼實現也比較簡單。了解原理之后可以根據幾個關鍵路徑手動安裝,或者在遇到安裝問題的時候可以通過本文的分析繼續排查解決。
